Blogging takes time, but with a bit of organisation it can be painless and not too time consuming.
When we started out it seemed like the blogging was taking over, it was all that the trip was about. It seemed to take up a vast amount of our time. Gradually, as the trip has progressed we have got into a bit of a routine, streamlined our processes, and it is now much more enjoyable and a lot less hassle.
We try, where possible, to use standard software, usually windows based, cheap or free if possible. We do not like all the free downloadable ones that tend to come with evil things attached.
We blog, mainly to keep a record of the trip for us. Secondly, it has been a great way to share our adventures with our nearest and dearest and to keep in regular contact with them. It has been a big surprise to us that others have been interested in our travels and we have a growing number of followers.
Susana set up the blog before we left and did a great deal of work choosing the platform, the theme and the various plugins, but that is for another post, an even more techy post. Today I want to talk about the day to day production of the post.
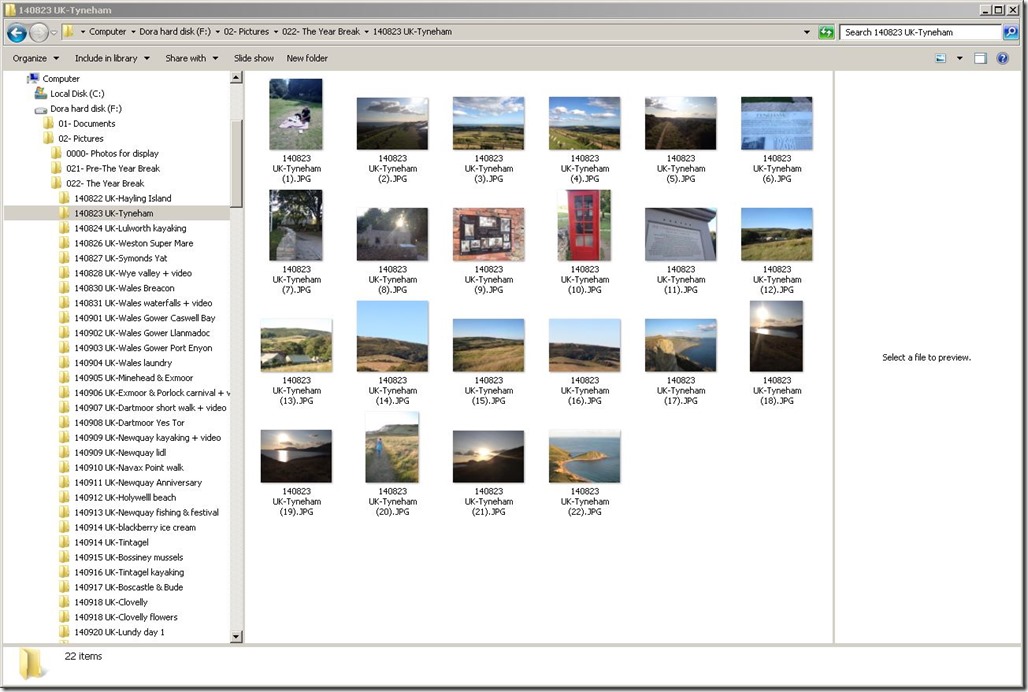
The first task is to put all the photos on the desktop. We have a robust filing system set up so we can find all the photos in the future.
In the past Susana and I have been really bad at recording our trips. Often we could come back home with only half a dozen photos, not good especially where when we went out on the hill. At least this trip has changed that.
The folder is reverse dated (year, month, day), then the country then the place. In this example 140823 UK-Tyneham. In this way Explorer will order them correctly. If the day has had two main activities, we might put them in separate folders- This is all so we can find them quickly in the future.
We then sift all the photos, deleting all of the bad ones; duplicates, blurred or poorly composed.
This has been really therapeutic for us, because not only have we gone through all this trip photos but we have gone back to our older collections. It has been great fun to revisit the many places we have visited over the years and really good to sort them all out. Our end game is to print out all our favourites and smother the walls with them when we get back home.
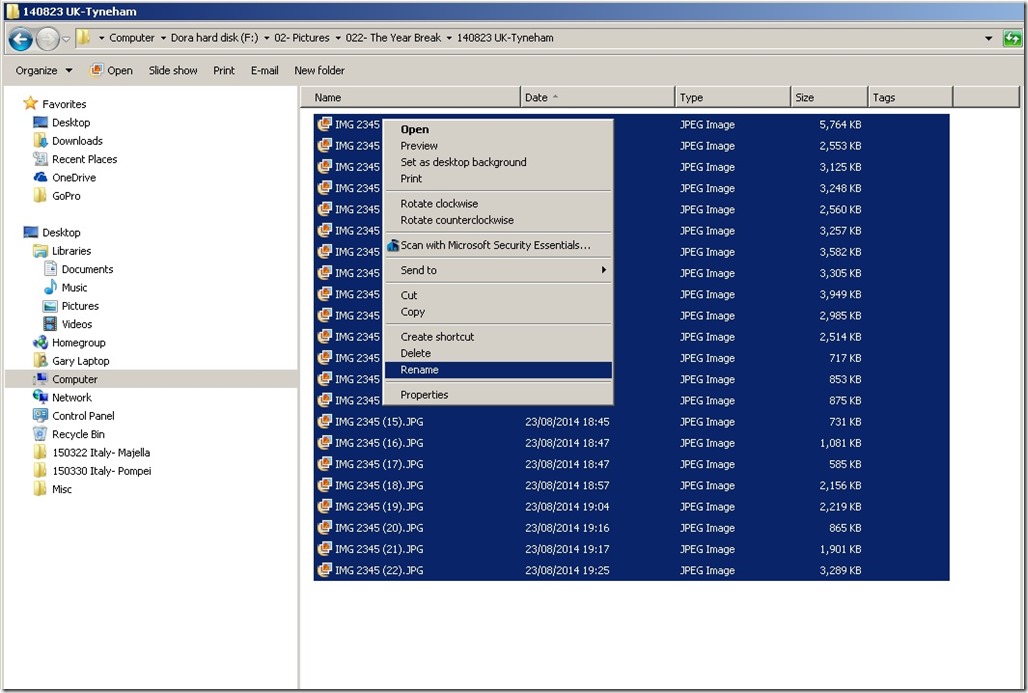
We then rename all the photos to match the folder name but also adding a number. Your camera will probably have given them abstract names which are good for nothing. Windows explorer can do this for you. Another advantage of this is if the photo gets misplaced, accidently put in a wrong folder, it can easily find its home again. Also if anyone requests a copy or a higher resolution, it will be easier to find.
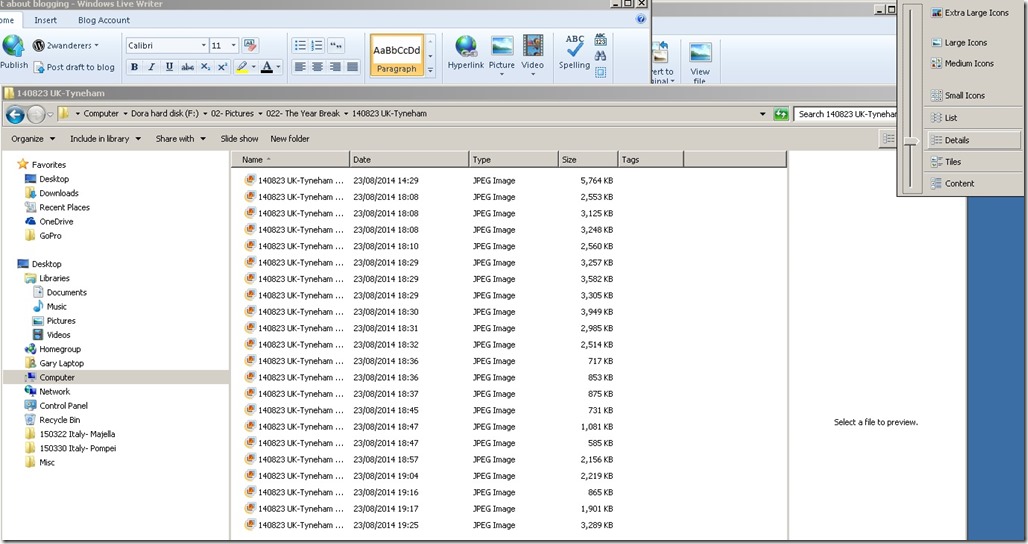
Show your files by details and then sort by date.
Select all the files you want to rename, hover over the first file and then right click on your mouse and select rename.
Voila, all renamed! The above process, of sorting the photos takes about ten minutes per day.
We now copy them to our external hard drive where all our data is kept. We back this up onto our computers regularly so if the hard disk or our computers fail we will still have a copy. This has already happened once, and the system is working, so far we haven’t lost a single file.
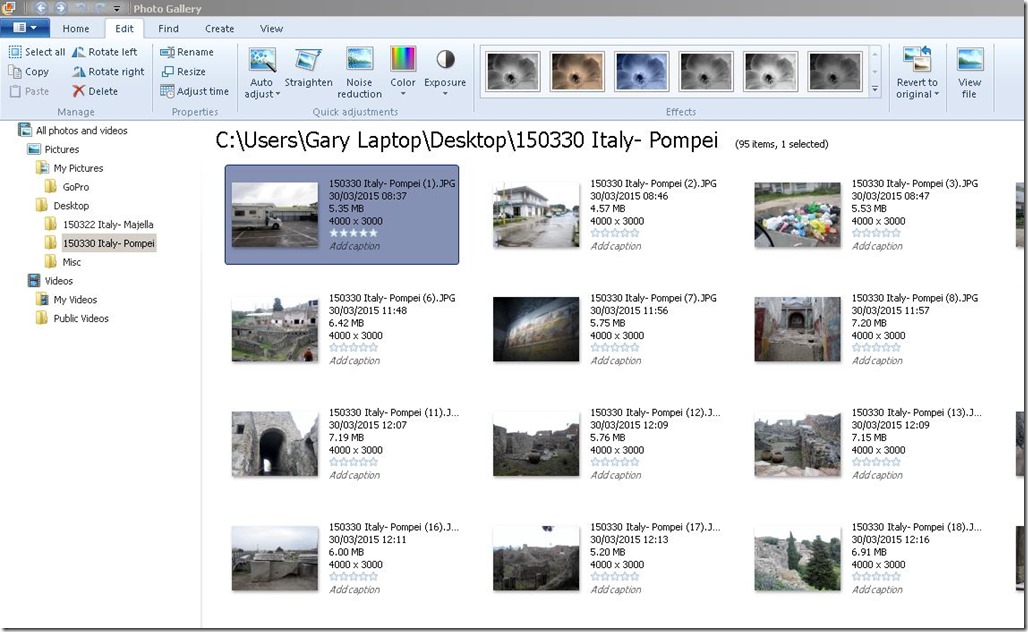
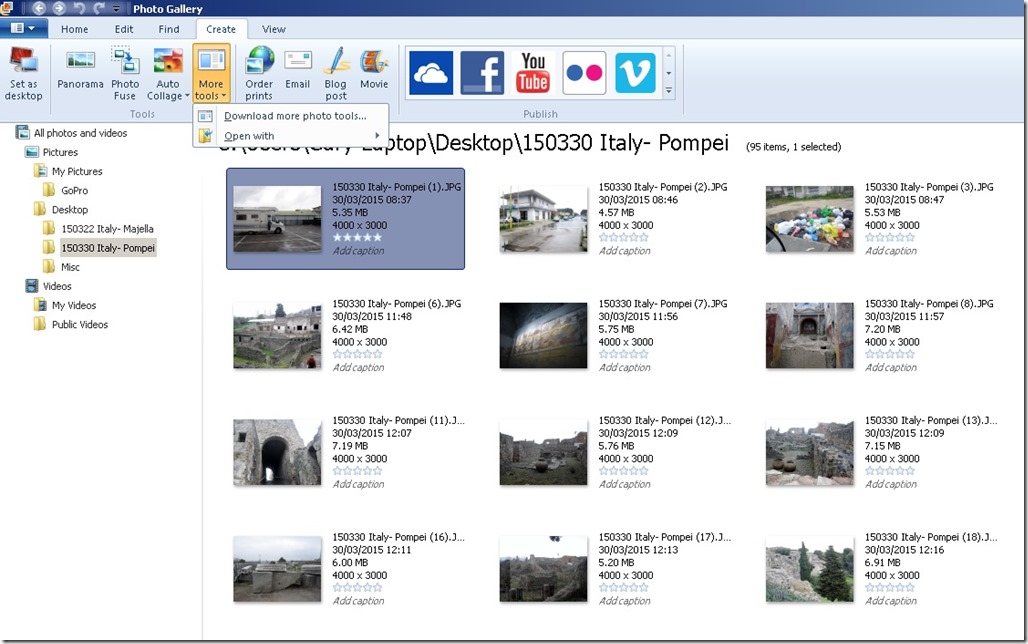
We are usually a week behind actually writing the blog, although currently we have 14 drafts ready to be published. When it is time to write a blog the first thing to do is copy the photos, usually back onto the desktop. We then use photo gallery to resize the photos, a free part of the windows software.
We resize them quite a lot, so that they will load quickly on mobile devices, but still look OK on a standard screen. It also keeps the blog size light when we have to upload it. We downsize to 640 pixels.
Photo gallery can also do some other neat tricks like;
Auto adjust- adjusts the exposure and colour, but can also straighten and reduce noise. The straighten can be a bit haphazard, but you can still do it manually, better to compose it well when you take the shot with the camera. There are various pre-set effects, which we avoid. You can crop and rotate.
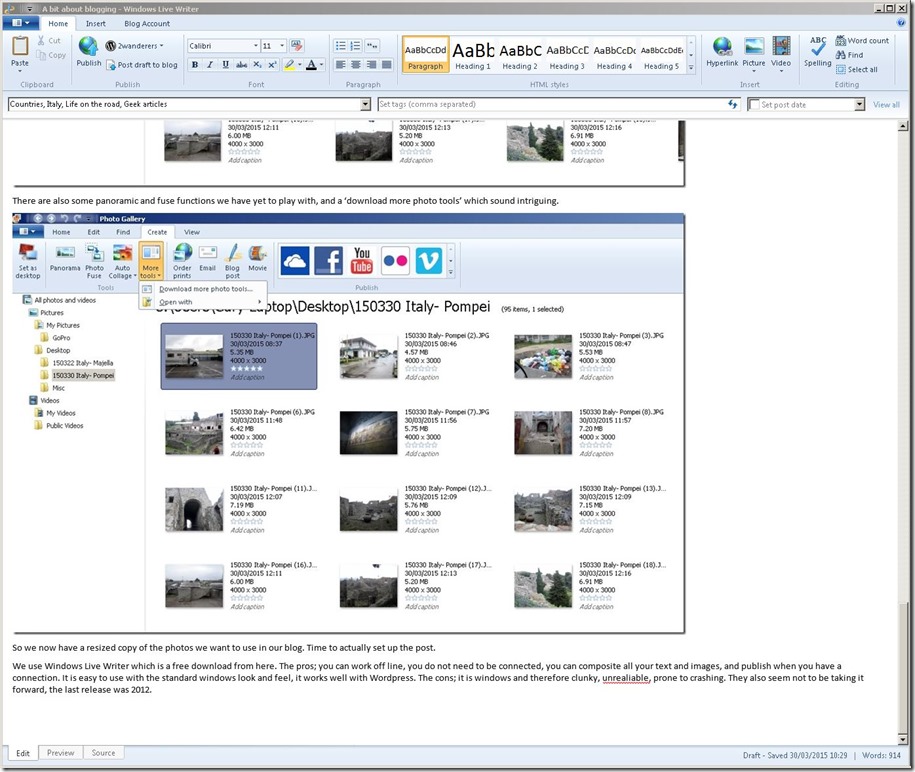
There are also some panoramic and fuse functions we have yet to play with, and a ‘download more photo tools’ which sound intriguing.
So we now have a resized copy of the photos we want to use in our blog. Time to actually set up the post.
We use Windows Live Writer which is a free download from here;
http://www.microsoft.com/en-us/download/details.aspx?id=8621
The pros;
you can work off line, you do not need to be connected, you can composite all your text and images, and publish when you have a connection. It is easy to use with the standard windows look and feel, it works well with WordPress.
The cons;
it is windows and therefore clunky, unreliable, prone to crashing. They also seem not to be taking it forward, the last release was 2012.
Things go wrong quite a lot, the spell check stop working. Save, close re-open, usually works.
Live writer allows you to create your posts categories prior to posting. These categories will be automatically set up in WordPress when you publish the post. What we are aiming to achieve here is to get as much ready as possible before we ‘Post draft to blog’ so we spend the minimum amount of time on line and use the least amount of data.
So we open a new live writer file, work out a new title, although this may come later as we compose the blog, doesn’t matter it can be changed. We set the categories.
A few things about categories, Susana and I have had long discussions about this, you have a lot of time to talk about such things when you are together 24/7 365!
Fundamentally they work as a search tool, although you do not want to many, one per blog, you need enough topics so that when you revisit them years from now you can find the different subjects you are looking for. You may find that as we continue we hone our categories a little, refine them, it is a work in progress!
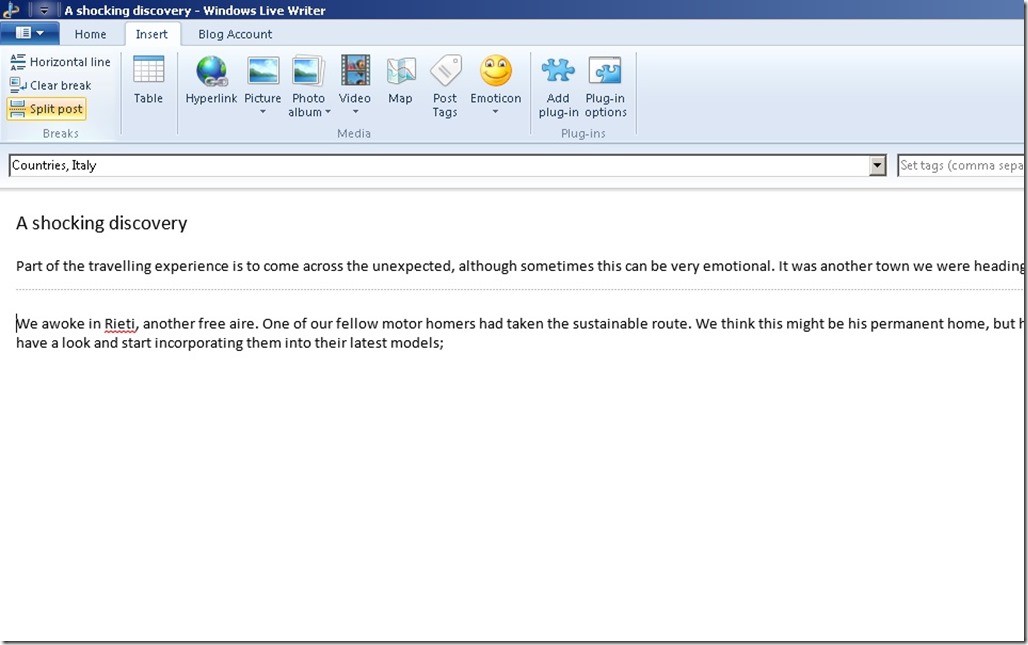
After you have written the first sentence or two you will want to insert/ split post. This is important, on your blog it will show the titles and if you do not split post, it will show the whole of the text, very untidy.
The split post show as a thin grey horizontal line. This line is the equivalent of the “Read More” button you see when you first click on the post.
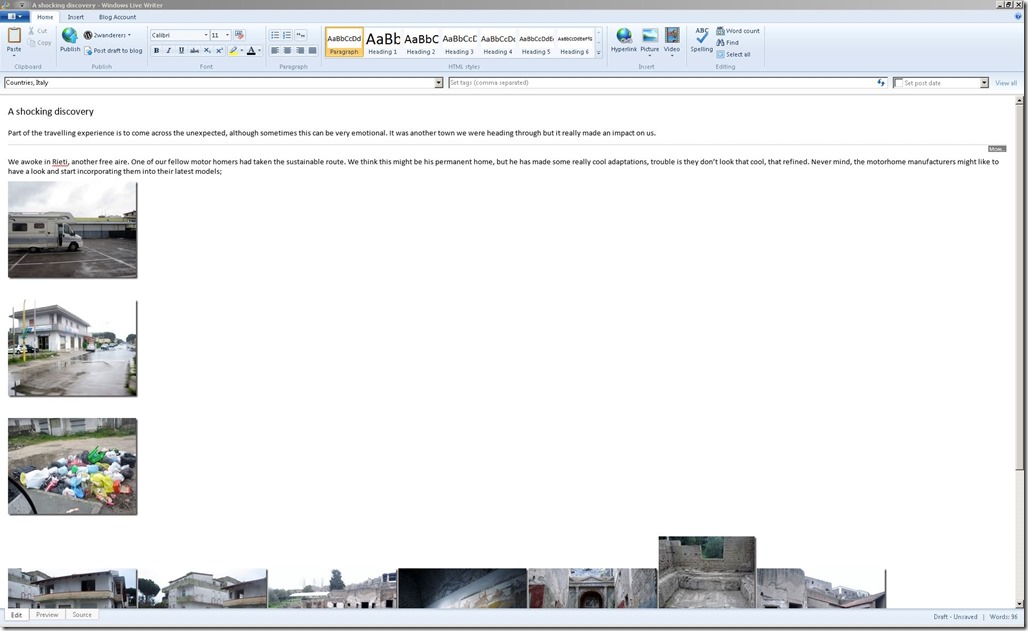
We then go and insert all the pictures. Insert/ pictures/ from your computer.
We always insert inline.
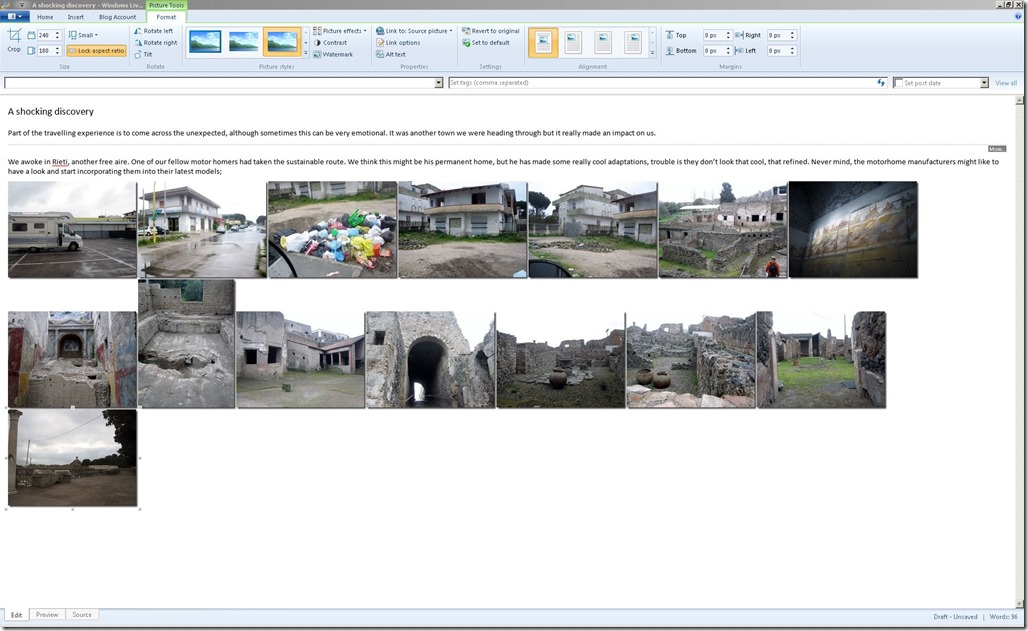
And then it pastes all of the photos, small like this.
Insert some returns to get them into a vertical line.
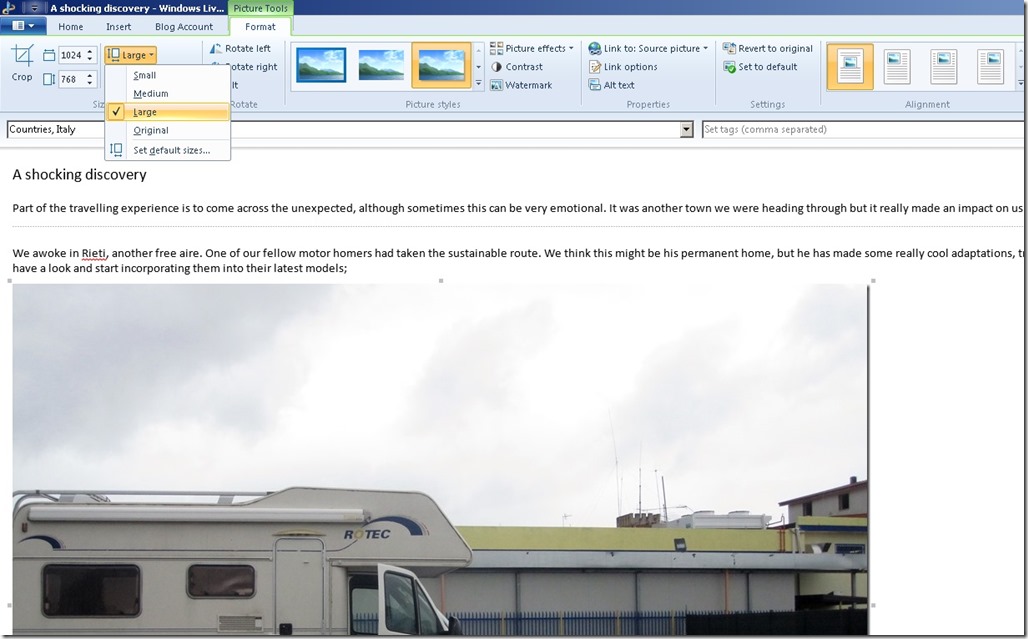
Then under the format tab, you can resize the photo; Susana uses medium, I use large. The ones in vertical format I fill in the custom width at 1024px so that all the images line up.
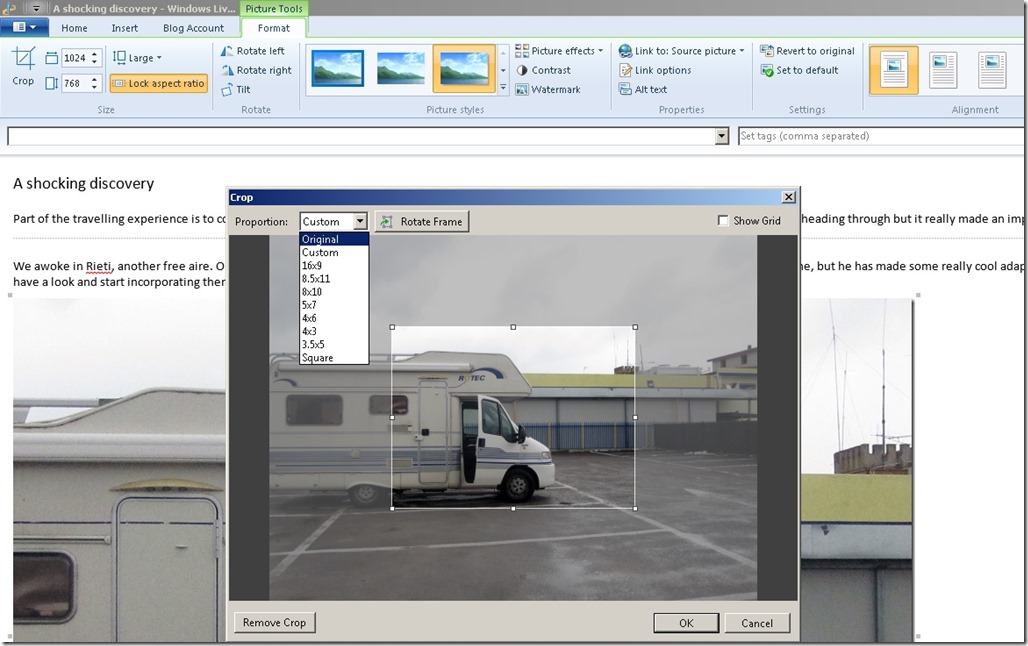
You can also crop the image here.
Selecting original will keep the proportions of the images the same.
Now write you blog.
Once happy go online and post to draft. We do not insert any videos at this stage, but that is for another geek post.
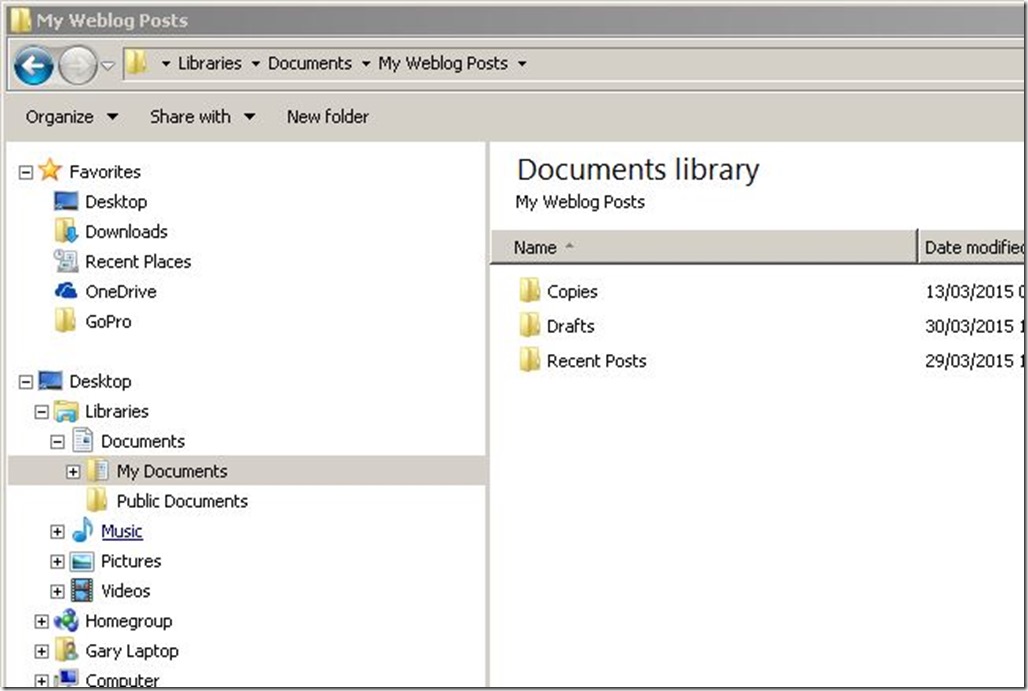
Live writer automatically keeps the draft blogs here;
We also create copies and save them onto our external hard drive, just in case the blog crashes, which it has a couple of times.
There are probably other programs you could write in, such as word, but you would then have to upload all of your photos onto your wordpress library. There maybe others that do this automatically like Live writer, send us an email if you know of any. You can obviously also write directly in wordpress but you need to be online to do this.
So now it is actually in WordPress as a draft. The wordpress interface is quite easy and logical and there are lots of free online tutorials.
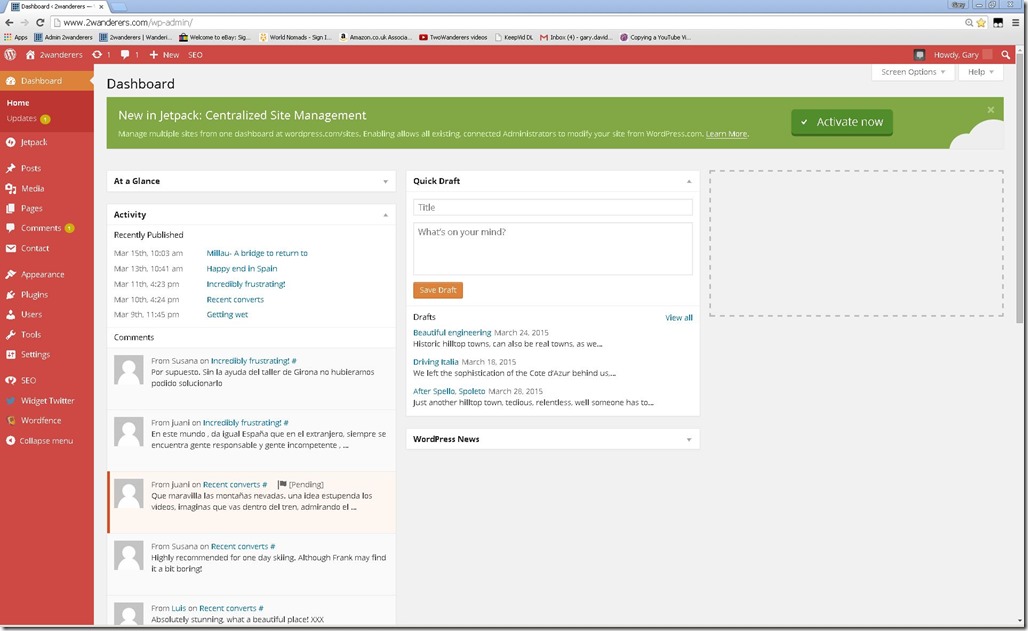
The admin homepage looks like this.
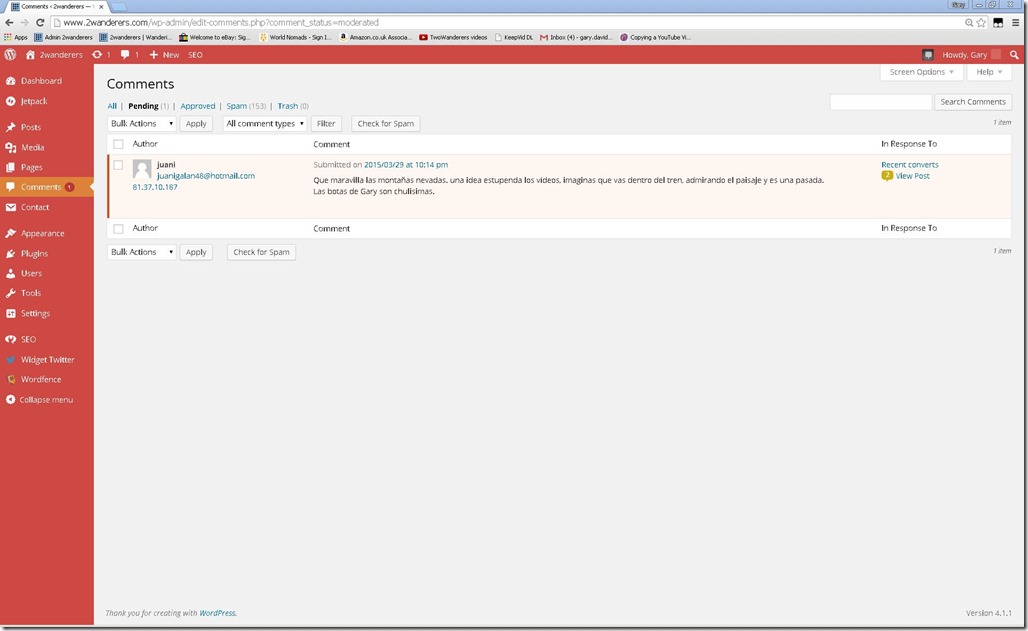
You can see any comments you have received;
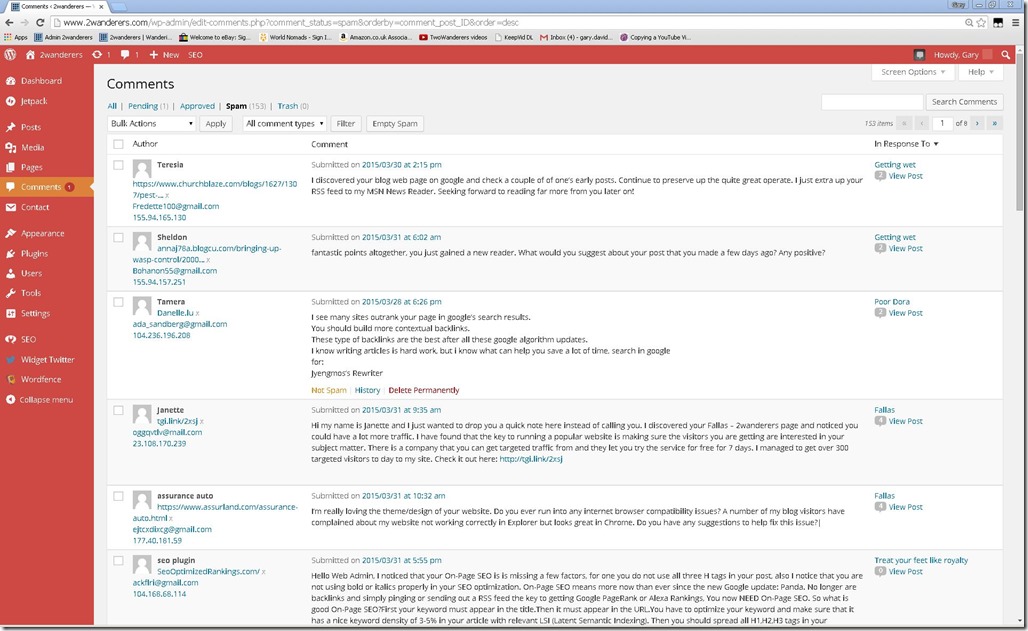
The majority of which might be spam.
We have a spam filter which pushes them straight to the spam folder, this is a plugin. We just empty it occasionally. I have no idea what these guys hope to get, the messages are usually selling stuff, usually complimentary, although sometimes offensive, and we get probably 150 a day. They seem to be attached to particular posts! All very strange.
We may miss some real comments here, we are really sorry if we do. Just please send us an email via the info address and we will try and answer any queries.
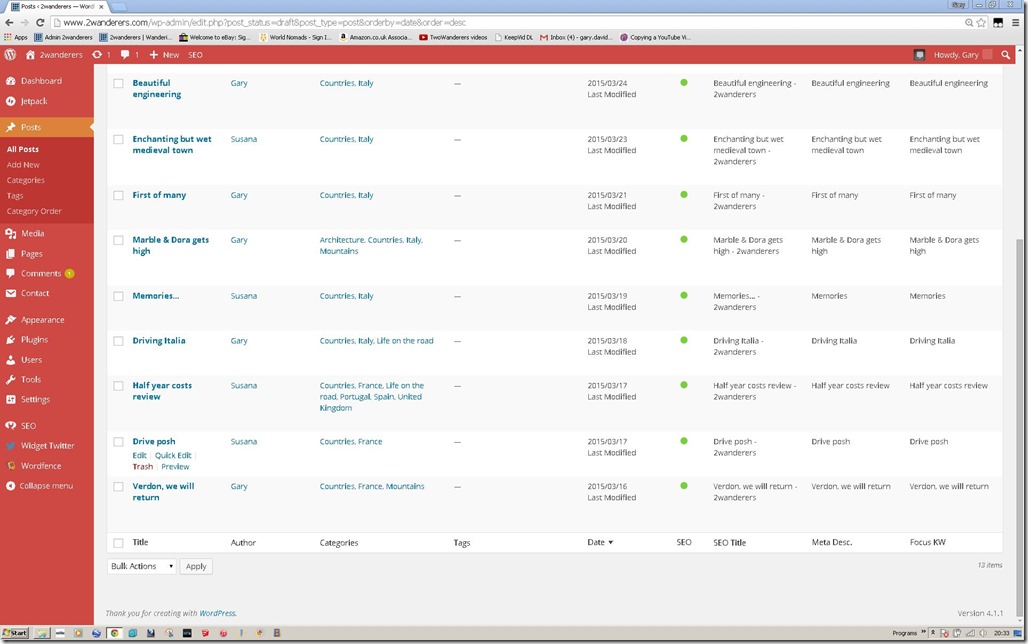
Going to the posts, and filtering to drafts and ordering by date we can work out which is the next blog to publish.
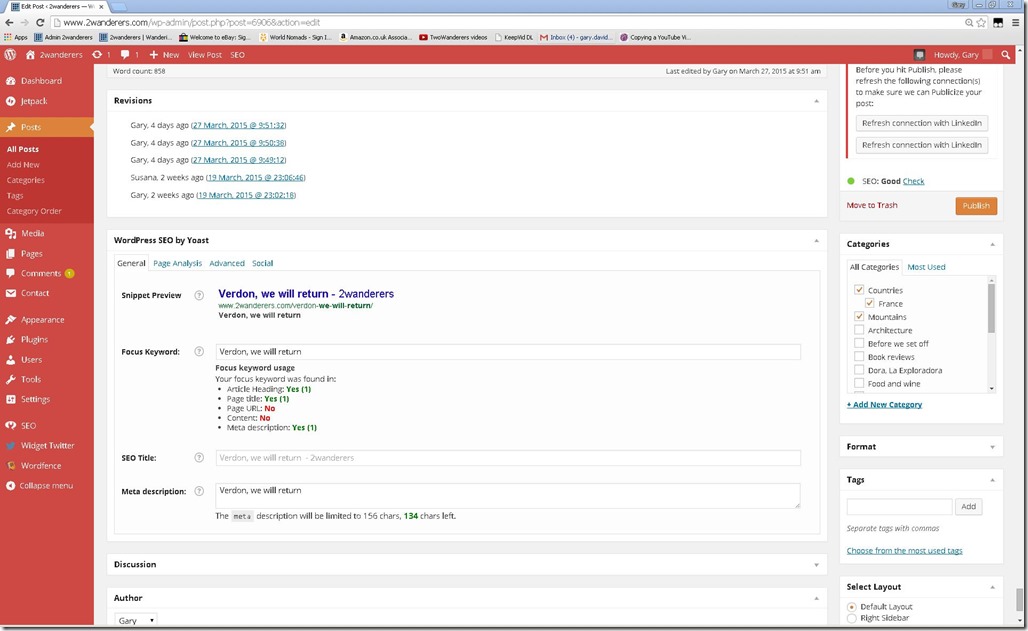
You then edit that post; fill in the focus keyword and meta description to match the title. We could probably get more visitors if we added more here so it came up on search engines, but heyho, maybe we will experiment a little on that one.
Then hit the publish button…
And a new post hits the web.
GDR





Muy buena lección seguramente a muchos de seguidores nos vendrá bien.
Vosotros tendréis guardo un gran recuerdo de vuestra aventura.
Precisamente ese era el objectivo. Y la seguiremos manteniendo despues de este anyo